Tower Tier List: Eternal Update for Ultimate Tower Blitz
by Aaron
Jun 13,2025
While you begin your *Tower Blitz* journey with just a single tower type, the game quickly opens up as you progress—unlocking a variety of towers, each with unique strengths and weaknesses. To help you build the most effective defense tailored to your playstyle, we’ve put together this **comprehensive tier list of all towers in *Tower Blitz***.
Recommended Videos
Table of Contents
- All Towers In Tower Blitz Ranked
- S-Tier Towers
- A-Tier Towers
- B-Tier Towers
- C-Tier Towers
- D-Tier Towers
All Towers In Tower Blitz Ranked

Image by The Escapist
We’ve ranked every tower in Tower Blitz, from S-Tier to D-Tier, based on their abilities, upgrade paths, cost efficiency, and overall performance. Here’s what each tier means:
- S-Tier: The absolute best towers that can carry you through any map or difficulty.
- A-Tier: Strong towers with minor drawbacks that keep them slightly below S-Tier.
- B-Tier: Average performers; usable but not optimal for high-level play.
- C-Tier: Generally weak, but may offer niche utility in specific situations.
- D-Tier: Poorly performing towers with limited use and low value.
You’ll find our full breakdown below.
S-Tier Towers
| Tower | Cost | Explanation | Pros and Cons |
|---|---|---|---|
 | To unlock the tower: 2500 Tokens (available at Level 25) To place in-game: 750 Cash | One of the most powerful support towers in the game. Essential for Expert mode, especially when paired with the right towers. Note: It cannot buff Recon Bases. | + Significantly boosts performance of other towers + Must-have for Expert players – Support-only tower |
 | To unlock the tower: 5500 Tokens To place in-game: 3800 Cash | A powerhouse tower with massive range and damage output. Ideal for late-game setups. Position it near the end of the path for maximum enemy destruction. | + Exceptional range and damage + Combines both damage and support capabilities – High cost |
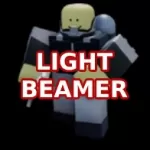 | To unlock the tower: Complete the contract To place in-game: 1800 Cash | Comparable to Electricizer, Lightbeamer is one of the strongest towers in the game. Best placed facing straight paths where its beam can eliminate enemies efficiently. Both upgrade paths are excellent. | + Extremely powerful against large groups + Excellent crowd control – Not viable early-game – Expensive |
 | To unlock the tower: 8000 Tokens (available at Level 45) To place in-game: 1000 Cash | Offers incredible value by spawning operatives that fight alongside you. Upgrades make these units even stronger. While costly, this tower is key for success in Expert mode. | + Continuously spawns combat units + Both upgrade paths are highly effective + Great for Expert difficulty – Upgrade costs are very high |
 | To unlock the tower: 1500 Tokens To place in-game: 500 Cash | The top choice for early-game dominance. While some may find it slow, taking the bottom path fixes this issue. Sniper remains relevant throughout mid and late-game, especially on Expert. | + Best early-game tower + Useful across all stages of gameplay + Deals high piercing damage – Somewhat slow firing speed |
 | To unlock the tower: Complete the contract To place in-game: 700 Cash | A highly versatile tower that can be used as either support or offense. Choose the top path for support or the bottom path for damage. Either way, Surveyor plays a crucial role throughout the entire round. | + Adaptable to various playstyles + Effective from start to finish – Limited to only 4 placements |
A-Tier Towers
| Tower | Cost | Explanation | Pros and Cons |
|---|---|---|---|
 | To unlock the tower: 1000 Tokens To place in-game: 650 Cash | A solid money-generating tower. Stick to the top path for reliable income. While useful in multiplayer, the bottom path often leads to financial losses if not managed carefully. | + Valuable in all game modes, especially multiplayer + Generates steady income over time – Bottom path lacks effectiveness 
![Roblox Forsaken Characters Tier List [UPDATED] (2025)](https://img.actcv.com/uploads/18/17380116246797f3e8a8a39.jpg)

|